Acer
Predator
ConceptD
Planet9
請問ASM3910 的硬碟抽取盒如何裝上硬碟? - Acer Community
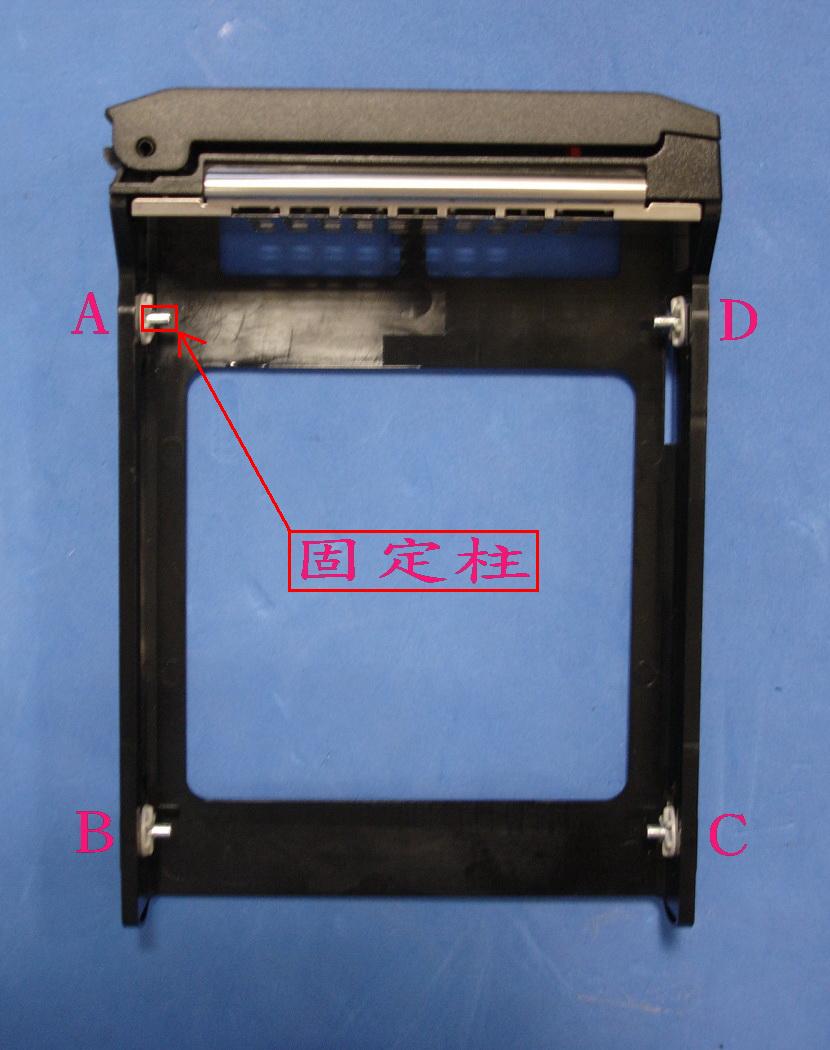
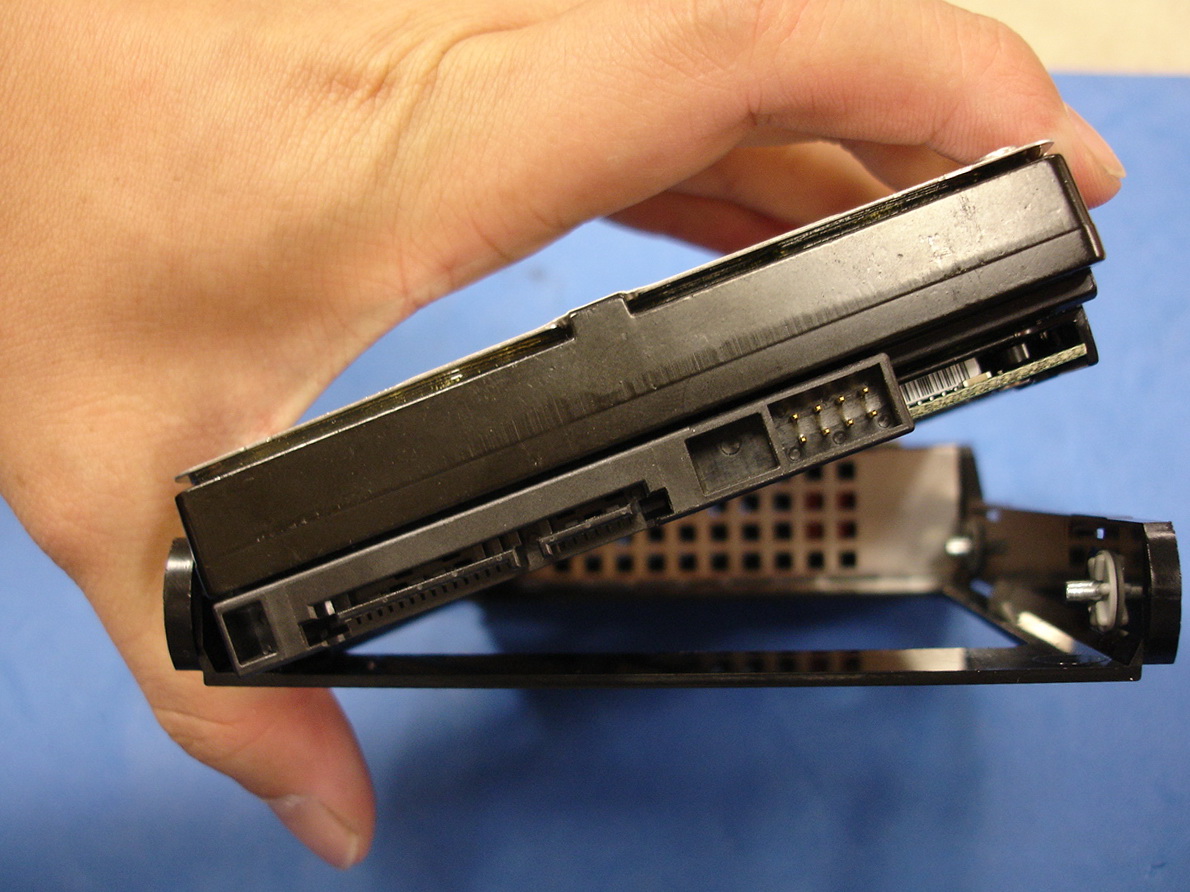
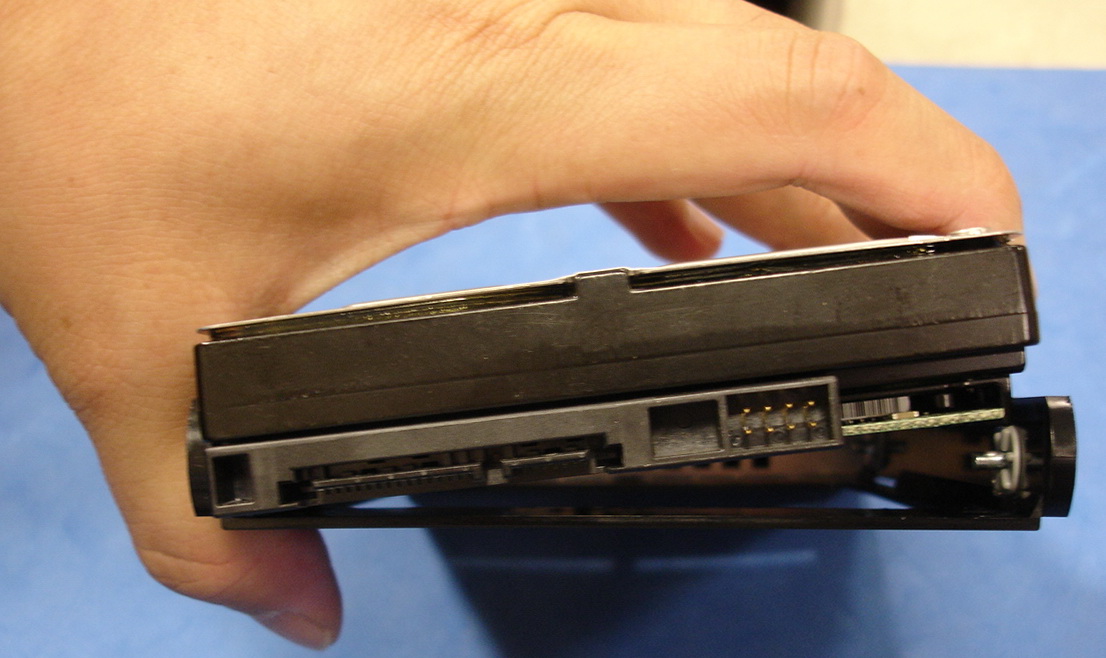
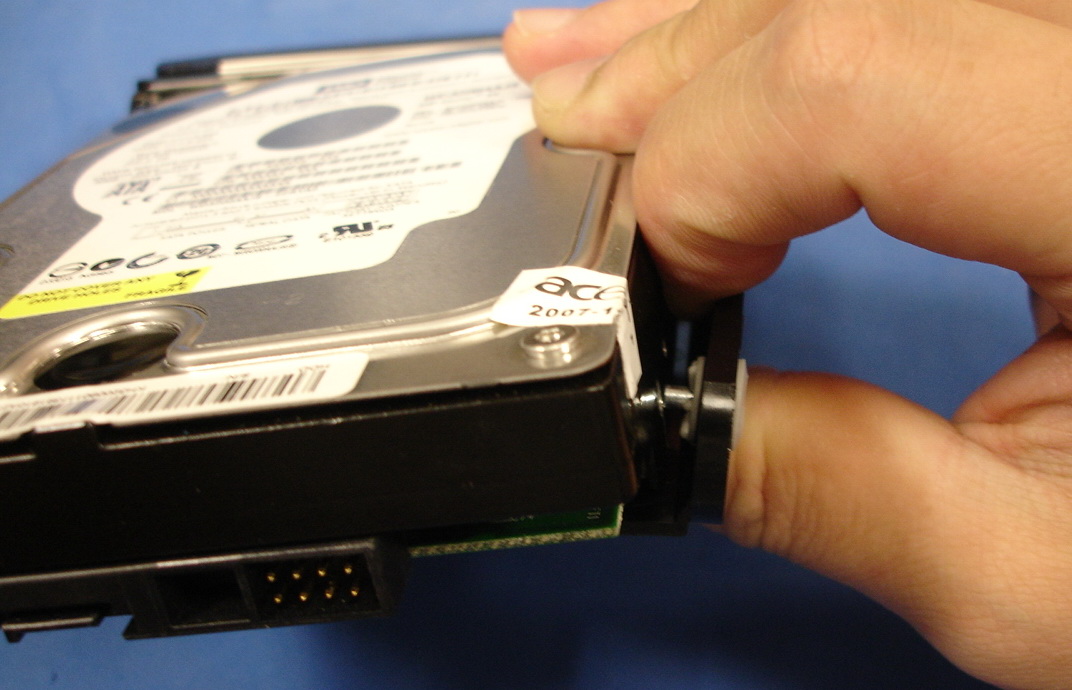
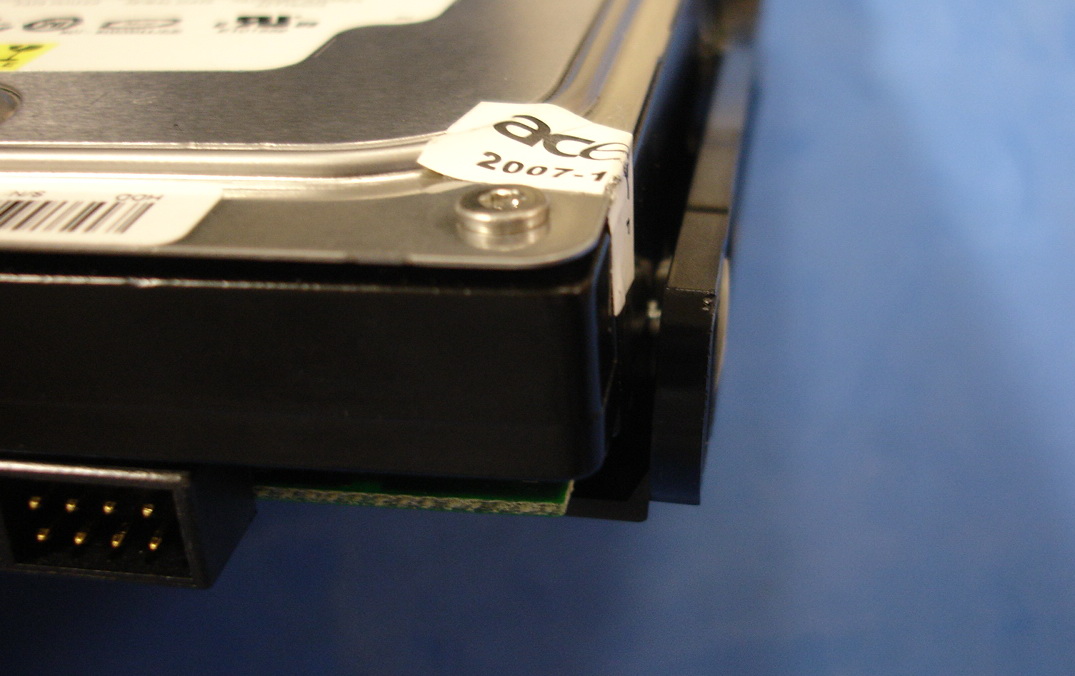
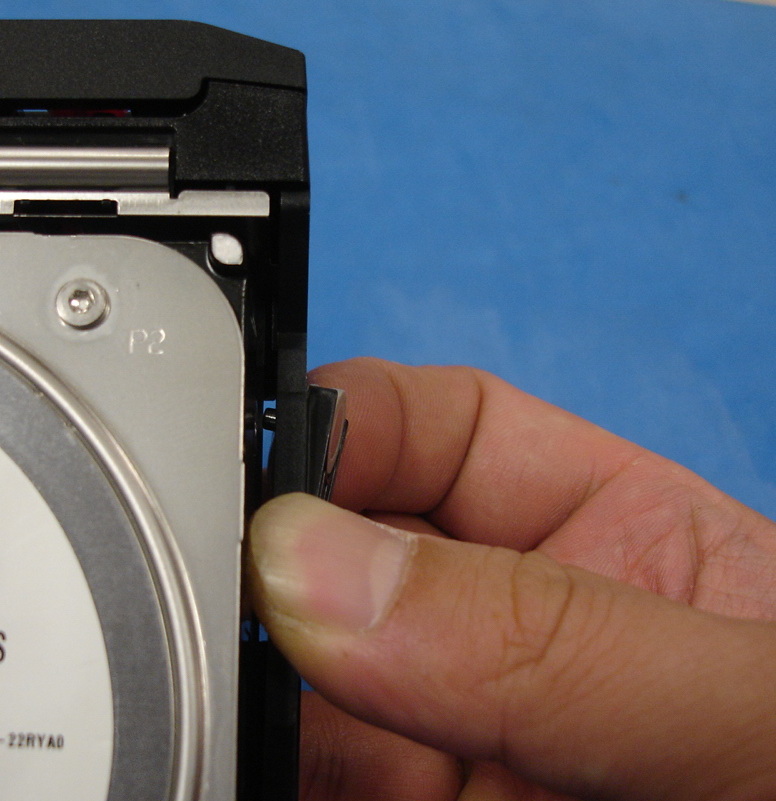
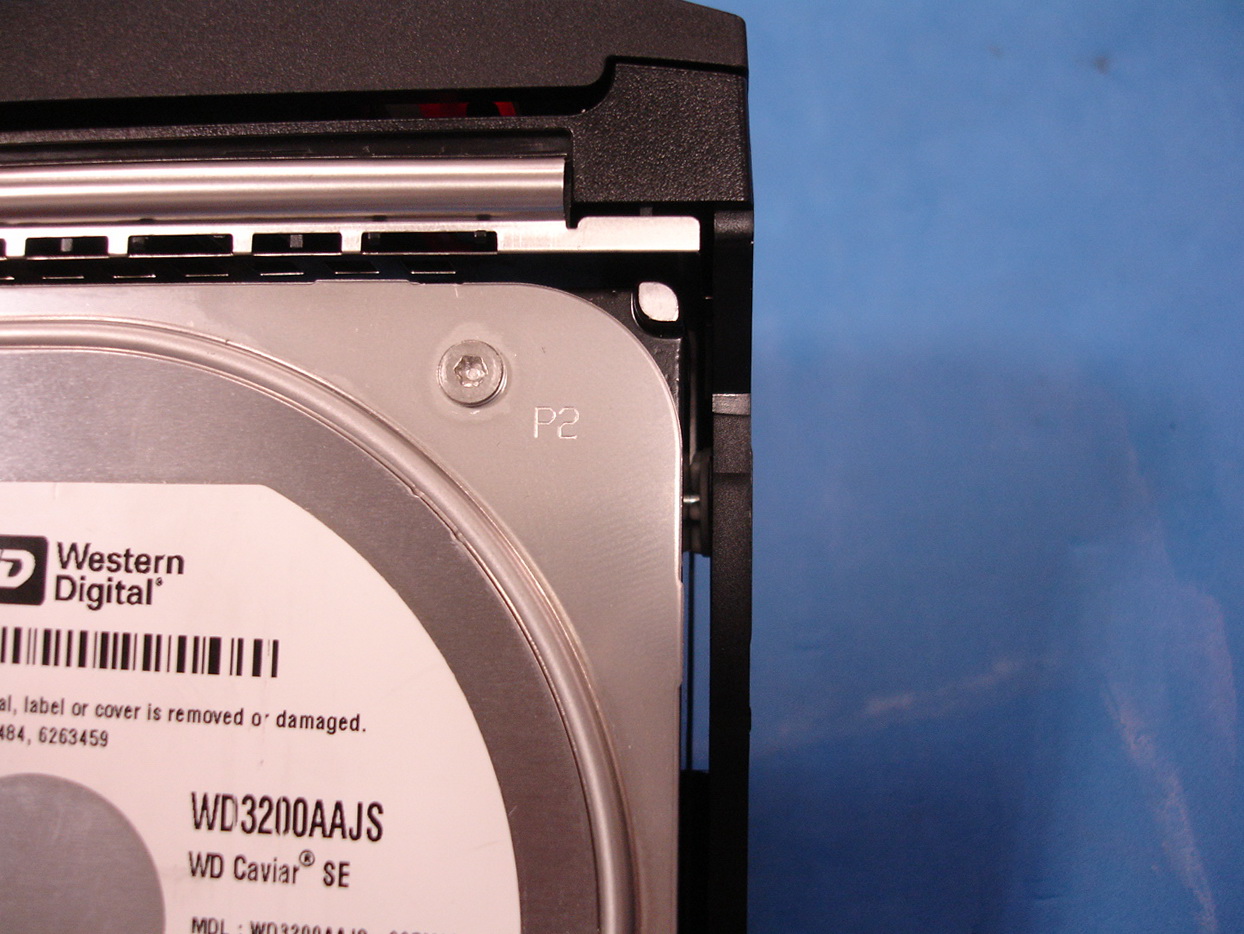
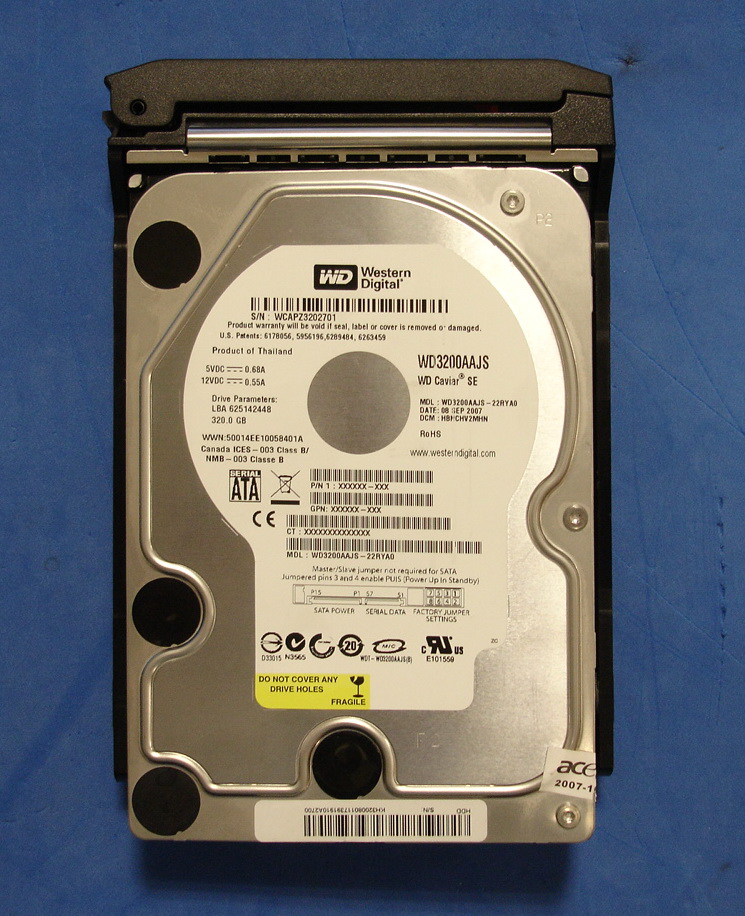
<main> <article class="userContent"> <h3></h3> <p>問題描述 : 請問ASM3910 的硬碟抽取盒如何裝上硬碟 ?</p> <p>安裝步驟 : </p> <p> STEP 0 : 硬碟抽取盒示意圖 。</p> <p> <img height="632" alt="STEP0.jpg" src="https://twcsd.acer.com.tw/acerdl/upload/tbFaq/F201007148/STEP0.jpg" width="500" border="0" class="embedImage-img importedEmbed-img"></img></p> <p> </p> <p> STEP 1 : 先將硬碟的一邊置入硬碟抽取盒中,並將硬碟的螺絲孔對準硬碟</p> <p> 抽取盒的A , B 點固定柱,然後將其裝入。</p> <p> <span style="color: #ff0000;">注意事項 : 硬碟放入的方向,需將硬碟的訊號及電源接頭那邊,朝硬碟抽取</span></p> <p><span style="color: #ff0000;"> 盒的開口方向擺。</span></p> <p> <img height="374" alt="STEP1.jpg" src="https://twcsd.acer.com.tw/acerdl/upload/tbFaq/F201007148/STEP1.jpg" width="500" border="0" class="embedImage-img importedEmbed-img"></img></p> <p> <img height="297" alt="STEP2.jpg" src="https://twcsd.acer.com.tw/acerdl/upload/tbFaq/F201007148/STEP2.jpg" width="500" border="0" class="embedImage-img importedEmbed-img"></img> </p> <p> </p> <p> STEP 2 : 將 C 點的固定柱裝入硬碟螺絲孔內。</p> <p> <img height="321" alt="STEP3.jpg" src="https://twcsd.acer.com.tw/acerdl/upload/tbFaq/F201007148/STEP3.jpg" width="500" border="0" class="embedImage-img importedEmbed-img"></img></p> <p> <img height="314" alt="STEP4.jpg" src="https://twcsd.acer.com.tw/acerdl/upload/tbFaq/F201007148/STEP4.jpg" width="500" border="0" class="embedImage-img importedEmbed-img"></img></p> <p> </p> <p> STEP 3 : 將 D 點的固定柱往外推,就可將硬碟裝入硬碟抽取盒,並將 D 點</p> <p> 的固定柱放開即可固定住硬碟 。</p> <p> <img height="516" alt="STEP5.jpg" src="https://twcsd.acer.com.tw/acerdl/upload/tbFaq/F201007148/STEP5.jpg" width="500" border="0" class="embedImage-img importedEmbed-img"></img></p> <p> <img height="375" alt="STEP6.jpg" src="https://twcsd.acer.com.tw/acerdl/upload/tbFaq/F201007148/STEP6.jpg" width="500" border="0" class="embedImage-img importedEmbed-img"></img></p> <p> <span style="color: #ff0000;"> 注意事項 : 只有 D 點的固定柱是可活動的,所以建議依照以上步驟安裝硬碟。</span></p> <p> STEP 4 : 安裝完成示意圖。</p> <p> <img height="614" alt="STEP7.jpg" src="https://twcsd.acer.com.tw/acerdl/upload/tbFaq/F201007148/STEP7.jpg" width="500" border="0" class="embedImage-img importedEmbed-img"></img></p><meta content="#Aspire M3910,#Aspire M3910"></meta> </article> </main>
Videos that might interest you